ApproachBuilders Blog
As a locally owned and operated business, we know that community is at the heart of everything we do -- and that there are many stories in the community worth sharing. Our Builder's Blog is a way for us to share that. From local events and up-and-coming communities to good, old fashioned-family recipes and home builder tips and trends that will take your home-ownership game to the next level!
Building Series: Step 3: Interior Reveal
August 26, 2020
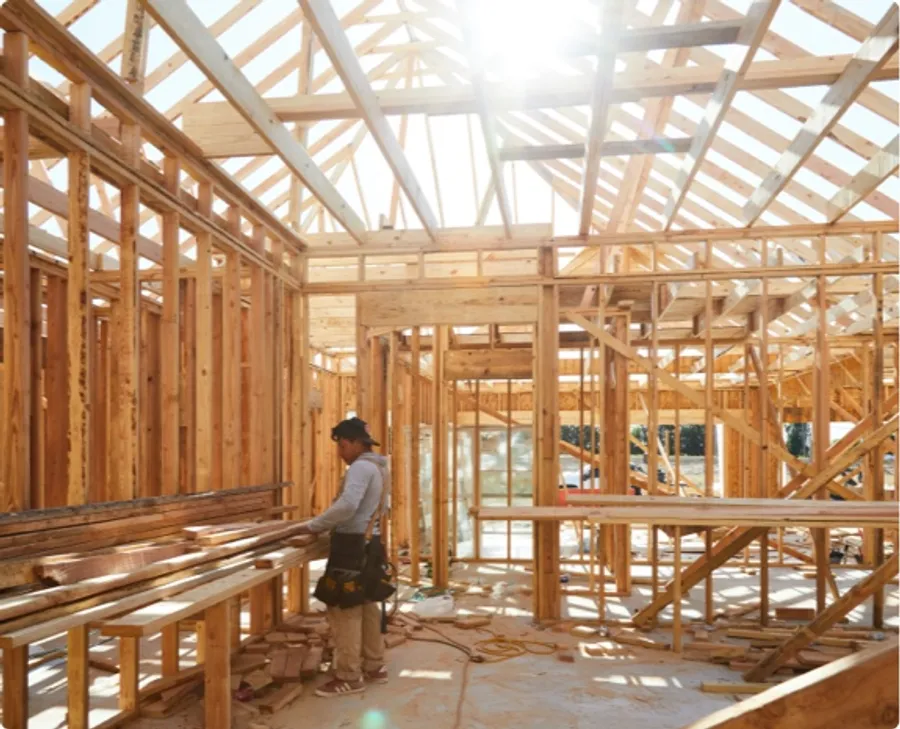
In the previous two posts, we shared the process of laying foundation and doing framing and roofing on one of our new construction homes. The videos followed along with our client Mary’s new home build in our Spring Creek neighborhood. But until now, it may have been difficult to visualize what the completed home would look like.
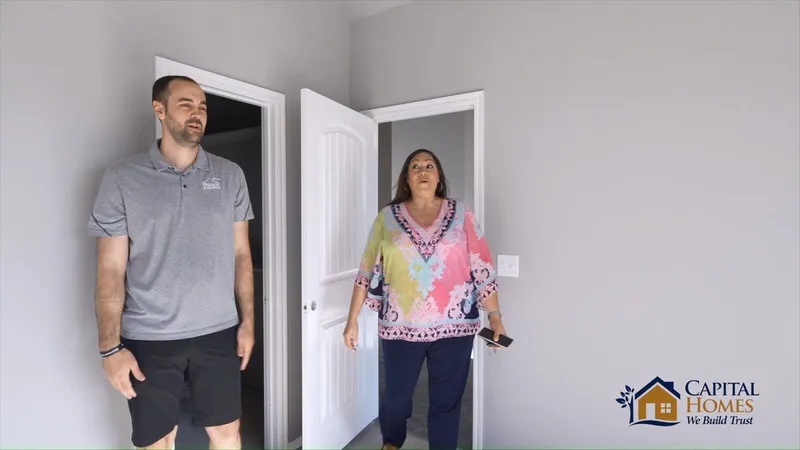
That’s how most of our homeowners feel when they go through this process. It can be hard to picture the finished product when you’re just looking at dirt, concrete, and some wood. That’s why our favorite step in this process is the Interior Reveal! In this video, you’ll see the interior of Mary’s house for the first time, right along with her!
Hours of dreaming, planning, and anticipation are realized in this phase, and we love to see our homeowners start to visualize themselves in their new home! It’s truly a special moment.
Of course, there are several steps that go into getting the home ready for the Interior Reveal. After the home is framed and roofed, our construction team, trade partners and contractors work hard to pull everything together. Important steps such as the sheetrock, bricklaying, flooring, cabinets, trim, and paint happen quickly and sometimes in tandem. Below, we’ll break down each step in detail. Or, just watch the video above to skip straight to the reveal!
Sheetrock
After your home has been fully framed and roofed comes the third big step of the construction process: sheetrocking, also known as drywall. This is what makes up the final, flat surface of your walls before painting. But before sheetrocking can begin, we must install all of the mechanical components within the walls. This includes plumbing (such as the installation of bath tubs), electrical wiring (rigging wall outlets), and the duct work involved with heating, ventilation, and air conditioning (HVAC).
After all of these internal components are finished, the city does an inspection of the house and gives the green light to proceed with construction. This is the point at which we begin splitting interior and exterior jobs, i.e. working on both the outside and the inside of the house at the same time in order to finish it more quickly. But for simplicity’s sake, we will continue to describe the construction steps sequentially.
Before the actual sheetrock, we spray on a thick layer of insulation so that your home will be well-insulated from the weather and also energy-efficient. We use a type of blown fiberglass insulation, with which we cover all exposed plywood, wires, and pipes. Then we have a third party visually inspect the blown insulation to ensure that it meets a high standard of quality. (This is the same company which will return at the end of the construction process to test for the energy efficiency of the house.)
The installation of mechanical components and insulation as described above takes one-and-a-half to two weeks to complete. Now that we are able to install the sheetrock itself, it will take one to two more weeks, depending on the weather.
We first put the drywall sheets in place by attaching them snugly on top of the wall studs. Then we bed and tape the joints, which means filling in and smoothing out the seams between the drywall sheets. (The bedding, also known as mud, is composed of drywall dust and water.) We let that dry, and come back for a second coat of bedding in order to blend out the taped joints so that the seams can’t be seen under paint. Then there is a skim coat, which will make the surface of the wall smooth and even.
Finally, all of the sheetrock joints are sanded and the walls are textured to guarantee that no seams are visible. Capital Homes uses a texture style called “orange peel,” which allows for a slightly dimpled but still semi-smooth surface. But if a homeowner doesn’t want any texturing on the walls, that can be done too! We’ll just need to do a few more finishing coats to ensure that there aren’t any imperfections. In either case, the walls of your home are now ready to be painted, although there will be a few more steps before then.
Bricklaying
Bricklaying is perhaps the most quintessential part of the idea of homebuilding. It has been a standard of quality in the construction industry for years, and it is very popular with homebuyers for its durability and aesthetic appeal. Whatever parts of your home exterior that you choose not to have covered with siding will be covered with either brick or stone. Stone is an upgraded alternative for brick and will be more expensive.
The brick- and/or stone-laying phase may happen concurrently with the sheetrocking or other interior construction steps. For bricklaying, we first hang a string line across the side of the house. This will ensure that the bricks are lined up neatly. As we lay each row (or “course”) of brick, we will move the string line up one course at a time until we reach the top of the wall.
Bricks are laid in the traditional bricklay pattern, meaning that the rows are staggered by about one-third to half the length of a brick. This is for both aesthetic and structural reasons. Mortar, which is a mixture of cement, sand, and water, holds the bricks firmly in place. There will be a quarter to three-eighths inch layer of mortar in between each brick.
At the top of the wall, there is a “brick pocket” formed by the framing underneath the overhang of the roof. We tuck the final layer of bricks inside that pocket so that the wall looks finished from top to bottom, and then repeat the same process for all the walls that require full brick.
For walls that already have partial siding (on the top half of the wall), the bricks will stop where the siding begins, right below the level of the windows. The final row of brick below the window will have the bricks laid on edge with the ends facing out. This is called the “rowlock.”
If you decide to finish a wall with stone instead of brick, the process is much the same. The only difference is that the stone is artistically laid and fitted flat on the mortar in a random pattern and does not require a string line.
At this point your home is structurally complete, and you can almost imagine yourself moving in. All that’s left is the interior woodwork, interior and exterior painting, and then the finalizing of all interior and exterior fixtures and other customer-choice components.
Flooring, Cabinets, and Trim
The next step toward the completion of your home is the hard flooring and woodwork. Any room in your house can be floored with real oak hardwood, luxury vinyl tile, or any style from our large selection of real tile. (Carpet will be installed at the end of the build so it doesn’t get dirty during the process.) The woodwork includes all trim, which is the decorative paneling along the edges of the floor, ceiling, and door frames. Woodwork also includes all of your closet shelving, cabinetry, and doors. We complete this step before painting because we believe it gives the final product a cleaner finish.
The flooring is installed first so that the woodwork, like cabinets and baseboards, can be installed on top of it. It may take 3-7 days to complete. How it is installed depends on the type of flooring. Real hardwood requires a subfloor, or underlayment, on the first floor. This is typically plywood and/or some other material that will protect your flooring from moisture expansion.
Real wood flooring is put together using a special type of nail that can securely attach one board to another without being visible. Tile will require a layer of mortar beneath it to stay in place, and can be laid in different patterns. All surfaces other that carpet require an underlayment on the second floor. In any case, installing flooring is precise work which our craftsmen take the utmost care in completing.
After the hard flooring is done, the trim, cabinets, and doors are installed, which only takes a day. The cabinets are custom-built offsite according to measurements that were taken at the framing stage.
There are two types of trim, six styles of doors, three different wood species of cabinets, and a number of cabinet door styles to choose from. None of these materials come pre-painted so that the finish is not damaged in transport, and also so that we can customize according to the buyer’s preferences on-site.
The doors and cabinets are set at the same time by different members of our crew, and then the baseboards and door casing are installed at the same time as the closet shelving. All of the woodwork is installed using trim nails. For some materials, like shelving, we will also apply some adhesive for extra strength. We are careful to ensure that the cabinets are level (so that the counters resting on top of them will be as well) and the doors swing cleanly.
At this point, the house has really started to come together. The next (and second-to-last!) step is painting, which will make it look even more like a home.
Paint
The painting of your home is the second-to-last phase in our series, even though after painting there will still be a month of construction left. Weather permitting, both the interior and exterior of the house will be painted at the same time. It usually takes 5-7 days to complete.
Interior painting is a more intensive process than exterior painting. There is a lot of prep work involved that takes longer than the actual paint job. This includes caulking all joints or seams inside the home as well as filling all nail holes.
Then, we cover all of the newly-installed flooring so that it stays clean, and proceed with the painting. The cabinetry is done first. You can choose either staining or paint from our available selection. Painters will stain the cabinets by hand, or paint them with a sprayer for an even coat.
The rest of the painting will be done mostly by sprayer due to the large surface area that must be covered. The painters spray the doors, door frames, and wall trim white. After all of that dries, we’ll cover the trim with masking paper where it meets the walls so that it stays pristine white, and then spray both the walls and ceilings with your chosen color. We also make sure to do backrolling, which means following after the sprayer with a paint roller to even out any discernible gradations. Any necessary touch up is done by hand.
For the exterior of your home, we first do the same prep work of filling joint and nail holes with caulking. We will use two colors to paint the exterior: a trim color for the fascia, corner boards, window trim, and door trim, and a body color for the parts of the walls that are covered with siding. The type of paint that we use for the exterior is specifically formulated to withstand the elements and act as a waterproofing agent.
Now the painting is complete! All that is left before your move-in is about a month of finishing installing fixtures (like plumbing and lighting) and outfitting your home with other accessories (like fencing and basic landscaping) according to your design specifications.
In our next post, we will share the steps involved in the “Finish” phase, and then share the most exciting part of all – the New Home Walkthrough!
Latest Posts
December 22, 2025
Home for the Holidays: Celebrating Christmas & Hanukkah
December 15, 2025
Bringing Homes to Life: Meet Our Incredible In-House Design Consultants
December 8, 2025
Meet the Team That’s Building Dreams — Not Just Houses
December 1, 2025
Welcoming 2026: Find Your Next Home With Capital Homes This December
November 24, 2025
The Heart Behind Every Home: Our Capital Family
November 10, 2025
Welcome to Phase II at Elysian Fields – Where Your Dream Home Awaits
November 10, 2025
Why the Tacoma Floor Plan Continues to be a Customer Favorite
November 4, 2025
The Birch: Spacious, Smart, and Designed for Real Life
October 24, 2025
Start Fresh with Capital Homes’ Clean Slate Program
What Our
Homebuyers Are Saying
"From high school sweethearts to homeowners, we looked long and hard to find the perfect place to start our future. Emerald Falls soon became everything we had hoped and planned for."